Google has so many useful tools that you may not even be aware of all of them. One of these tools that I frequently use is Google My Maps. Google My Maps allows you to create and customize your very own map, pinpointing certain locations of interest. The finished product is a visually pleasing representation of the different locations of interest with your own custom features added such as icons and color schemes. So, whether you want to utilize this tool for personal use such as planning what restaurants you want to try out on your next vacation or creating a visual list of your business’s upcoming events, Google My Maps will become your new best friend. Here are the steps for getting started with creating your own custom map within Google My Maps.
Navigate to Google My Maps to create a new map
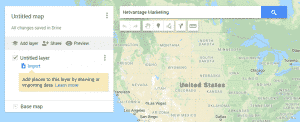
Getting to Google My Maps is a simple task once you are logged into your Google account. Simply navigate to Google My Maps and look for the red box in the upper left-hand corner that says + Create a New Map. Select this to get started creating your very own map!

Adding each location to your map
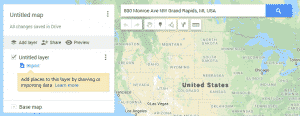
Once you’ve made your way to the blank new map you can begin adding each one of the locations that you want to go on your map. To do this, simply search the name of the place or the address of the place in the search bar at the top of the page.


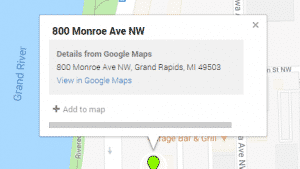
When you have landed on the correct location, you will now want to add this spot to your map. To do so, click on the button that says + Add to map.

Once you’ve added the location to your map, you will be able to see this place listed on the left-hand side of the screen. You can continue repeating this step until all your desired locations have been added to your map.
Let’s customize!
Google has a ton of different customization options when working with My Maps. An option that I really like is the ability to change each one of the icons that pinpoint each place on your map. For example, if you’re doing a list of events taking place at an apple orchard, you can replace the standard icon with an apple instead. To do this, go back to the list of all your locations on the left-hand side of the screen and hover over one of them with your mouse. When doing this, there will be a tiny paint can that appears to the right of the location your on. Click on this paint can icon to be brought into the customization box as seen below.
![]() This box gives you the option to change the individual color of each icon along with the icon itself. Google supplies you with a selection of standard icons to choose from, but you can also upload your own icon if you’d like. To do this, click into More icons and then Custom icon at the bottom left-hand corner.
This box gives you the option to change the individual color of each icon along with the icon itself. Google supplies you with a selection of standard icons to choose from, but you can also upload your own icon if you’d like. To do this, click into More icons and then Custom icon at the bottom left-hand corner.
You can repeat this process to change each one of the icons to whatever you’d like it to be. Here’s an example of a finished custom icon that I used for pizza. As you can see, you are able to get very creative with this and create just about anything you could imagine.
That’s a wrap
Once you’ve gone through these easy steps, you will have your very own custom map that can be shared with customers, friends, or anyone else. These maps can be especially handy when your business has different events in the area and you want to present them in a unique way rather than just a list. Overall, My Maps has a ton of different uses whether it be for your business or for personal use.

Hi Kelli, I like the Google My Maps format and I know how to embed onto my website. However, for our commercial purpose, we do not wish to allow viewers to share the map nor copy it. The whole purpose is to drive traffic to our website alone. Do you know if there is a way to remove this share option once embedded onto a website?
Hi Ben. Yes, there is an option in Google My Maps that will allow you to either create a standard sharing link to embed or a sharing link where anyone on the internet can find and access it. If you go with the latter option rather than the former, users will only be able to view your map without sharing or copying it. Hope that helps!